Take 02
A room that sounds quiet
Most home recordings suffer from the room more than the microphone. Fixing that costs less than a new mic.
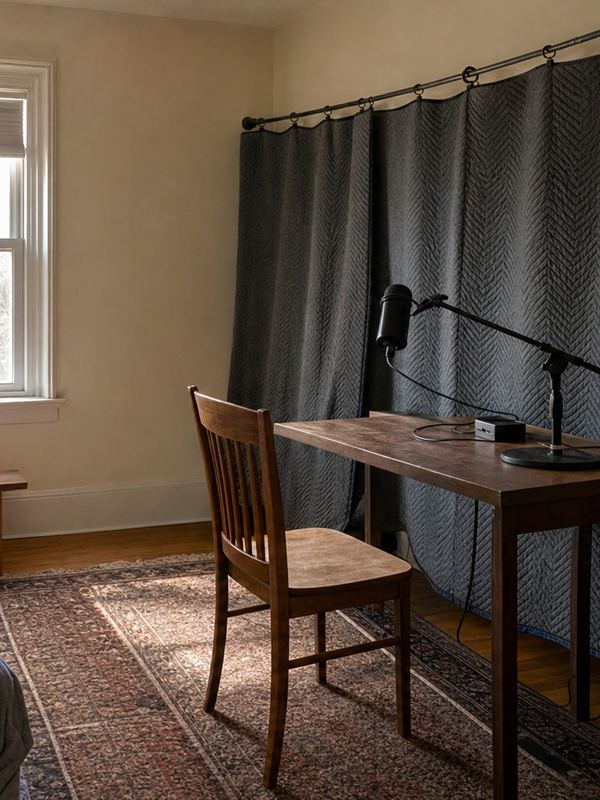
Bare walls are the problem. Sound leaves the voice, hits flat plaster, and comes back a few milliseconds later to blur the words. In an empty room it bounces several times before dying away, and a microphone faithfully records all of it. The result is the hollow, bathroom quality that makes a home recording sound like one.
The fix is soft, heavy material close to the voice, and it does not need to look like a studio.
Start with what is already in the house
A walk-in closet full of clothes is often the best-sounding space in a home. The hanging fabric soaks up reflections on three sides. Face into the clothes rather than out toward the door, and the room nearly disappears from the recording.
If there is no closet, a bedroom comes second. Beds, curtains, rugs and a stuffed bookcase all absorb or scatter sound. The worst rooms are kitchens and bathrooms, for the same reason they are easy to clean.
Moving blankets
Thick moving blankets are cheap and they work. Hang two or three on the wall behind the microphone and one behind the person speaking. The second one matters more than people expect, because the voice travels backward too, hits the wall behind the speaker, and arrives at the microphone a moment later. Hang them from hooks or a curtain rod a few centimetres off the wall rather than flat against it; the air gap helps with lower frequencies.
Where to stand
Avoid the middle of the room and avoid corners. The middle puts the speaker at equal distances from parallel walls, which is where reflections pile up. Corners boost the low end. About a third of the way into the room, facing the longest open space or the blankets, is a good first position. Move half a metre and listen again. It is free and it changes more than any setting on the recorder.
Keep the microphone close, about a hand's width from the mouth for speech. The nearer the voice, the less of the room the microphone hears in comparison.
A pop filter between mouth and microphone stops the bursts of air on P and B sounds. A stretched piece of old tights on a bent coat hanger does the same job for nothing. Put it a few centimetres in front of the microphone and speak through it.
Noise from outside
Treatment and soundproofing are different jobs. Blankets stop the room from echoing; they do very little to keep out a passing truck or a neighbour's lawnmower. Keeping outside noise out takes mass and sealed gaps, which is construction work. For most home recording the cheaper answer is timing. Record early in the morning or late at night, learn when the street is quiet, and keep a note of the regular disturbances: the bin lorry, the school run, the afternoon flights.
Close the window, of course, and roll a towel along the bottom of the door. A gap under a door lets in far more sound than its size suggests.
The check
Clap once, sharply, and listen on headphones. A treated room swallows the clap almost at once. An untreated one rings. Then record ten seconds of silence and turn it up; that is the noise floor, and the fridge, the air conditioning and the computer fan are all in it. Turn off what can be turned off.